

Story spoons are a great tool for speaking and listening, cheap to make and so much fun too! In this blog post, we’re going to be showing you how to make some Humpty Dumpty story spoons to help you take part in the Humpty Dumpty rhyme for World Nursery Rhyme Week 2018, or just generally! Of course this craft doesn’t have to be just limited to that one rhyme, you can apply the same thinking to other rhymes, fairy stories and characters too, and best of all it couldn’t be easier!
What you need
- Wooden spoons (these can be bought very cheaply from places like Home Bargains and Poundland).
- Printed Humpty Dumpty Story Spoon Decals – we have made some for you to download and print here.
- Decorative materials such as crepe paper and felt tips – whatever you fancy.
- PVA glue.
- Coloured felt.
- Googly eyes.
How to make your Humpty story spoons
- If you like, you can either colour the handle of your spoon or cover in crepe paper by twirling the paper round the handle. This isn’t necessary, it just makes everything a bit more colourful and decorative.
- Download, print then cut out our Humpty decals.
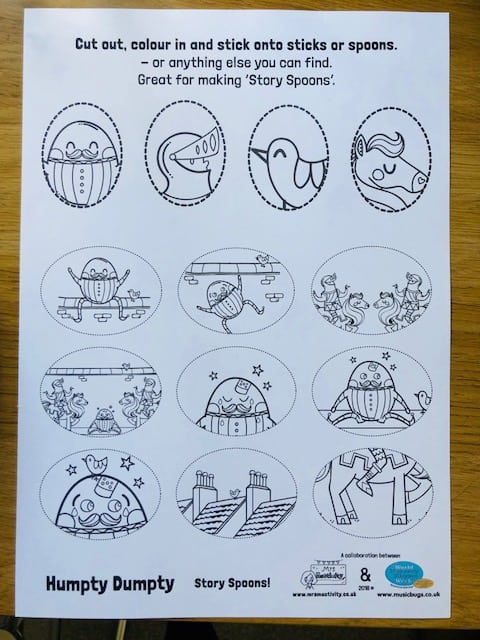
3. Using PVA glue, stick a decal to the back of the spoon.
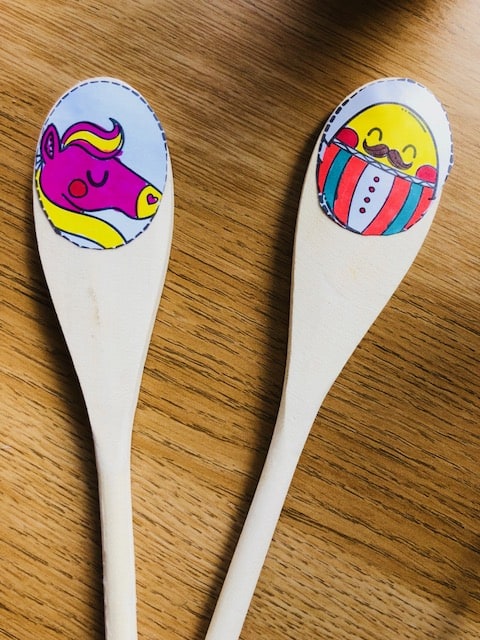
4. Use the felt to cut out arms and legs shapes, using the glue stick these on as you can see in this photo.

How to use your Humpty story spoons
When you’re done, use the spoons to act out the nursery rhyme whilst you’re singing along. For older children, ask them to use the spoons to act out a different ending, or what they think happened before the rhyme? How did Humpty end up on the wall anyway?
To access additional resources go to Mrs Mactivity’s World Nursery Rhyme Week Resources.
Please note that supervision will be required for activities using small parts with young children.
